Heltic
Overview
While checking out the ChainMaillers forum, I came across the unattributed Heltic weave. This member of the European, Japanese, and Helm Chain weave families, is a straightforward variant of the Helm Chain and Celtic weaves that adds additional ‘spike’ rings. I have written and included this tutorial as I could not find publicly available tutorials.
Materials
For the sample piece showcased in this post, I used two sizes of rings made by hand from 16 SWG Bright Aluminum wire purchased from The Ring Lord. The smaller rings have an ID of 5mm for an AR of 3.1. The larger rings have an ID of 9mm for an AR of 5.5.
Tutorial
-
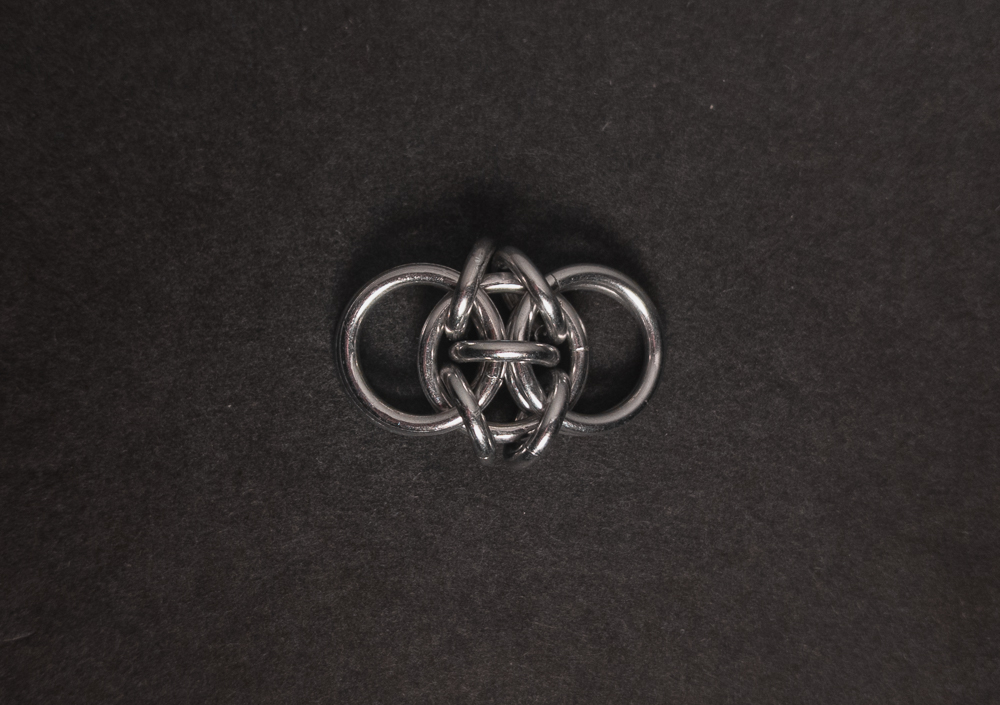
We begin by making the first unit, starting with a 2-1-2 chain using 4 large rings and 1 small ring. When done, it should look something like this:
-
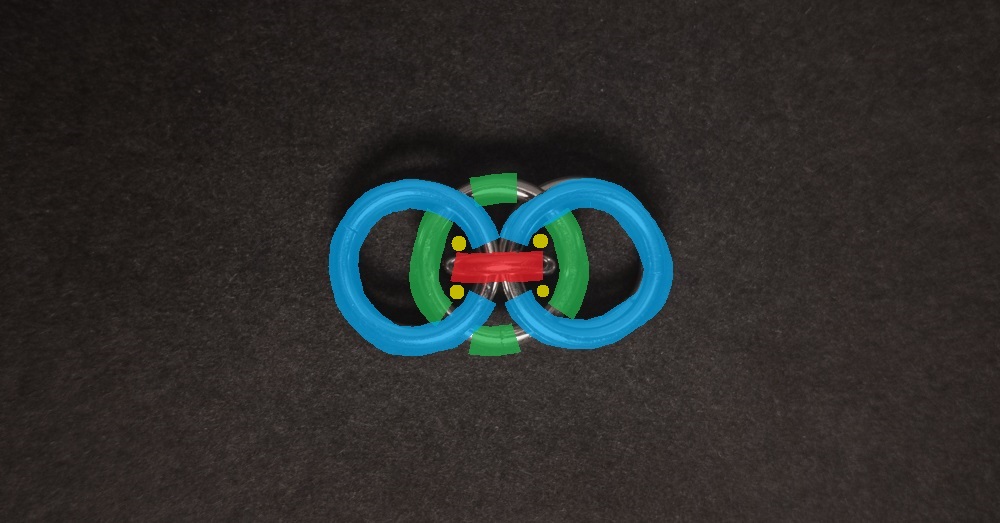
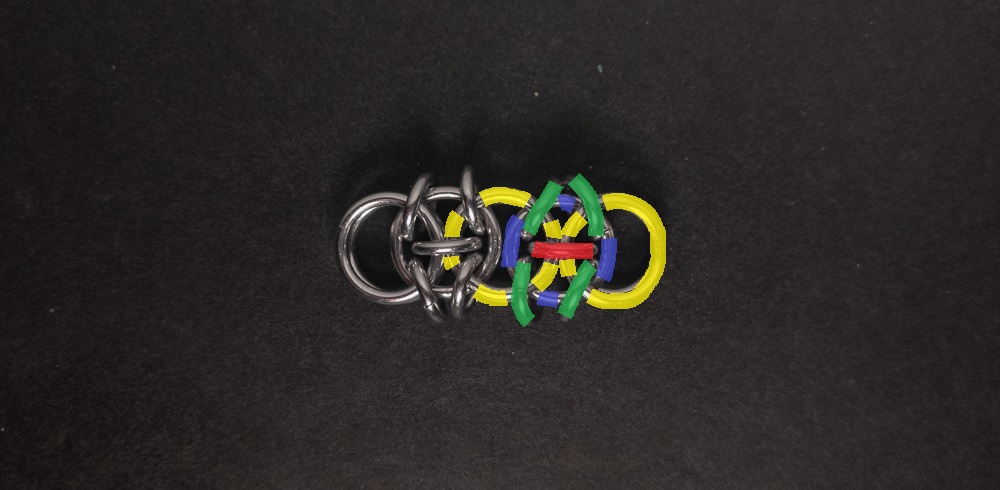
Add 1 new large ring (green in the image below) around the small ring from the previous step (red in the image below) to form an orbital connection. This new large ring should sit between the large rings from step 1 (blue in the image below) with 2 above and below, and 2 on the left and right. When done, it should look something like this:
-
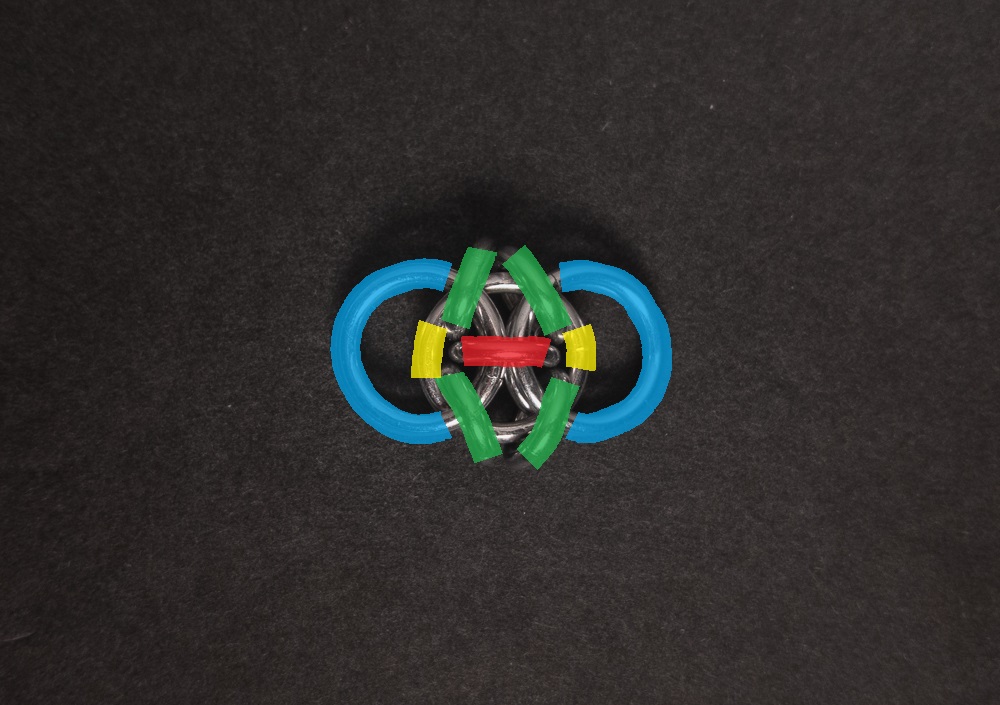
Add 4 new small rings (green in the image below) through the eyes (yellow in the image above) formed between the large ring from the previous step (yellow in the image below) and the large rings from the step before that (blue in the image below). If you separate the top and bottom by the small ring from step 1 (red in the image below) and base left and right on where the large rings from step 1 are, you should put 1 new small ring through each combination of top/bottom and left/right. When done, it should look something like this:
-
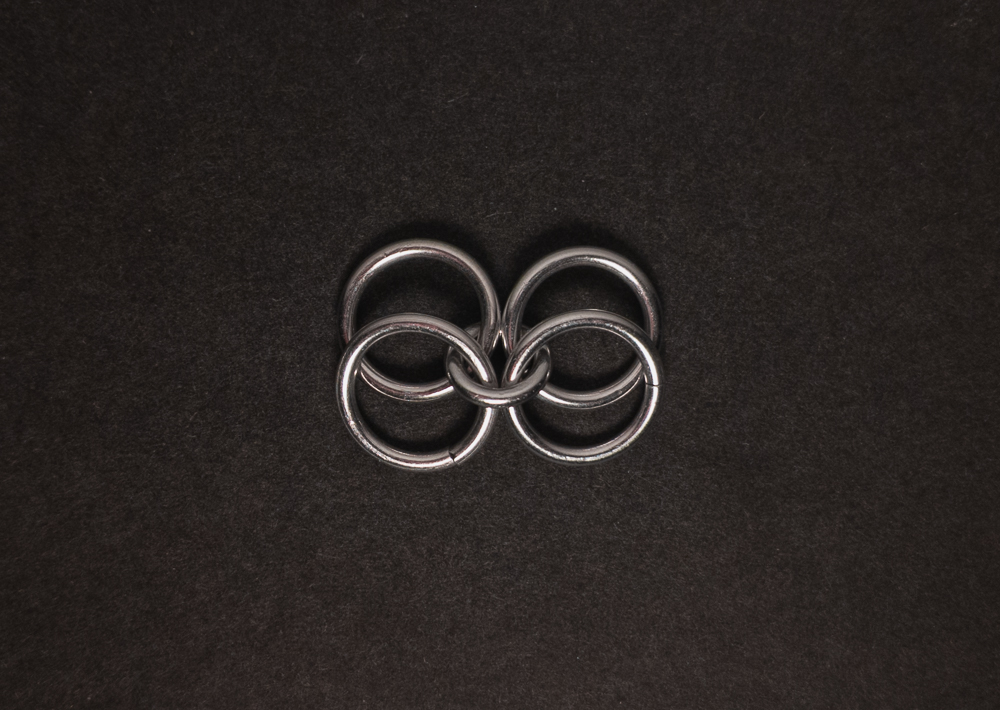
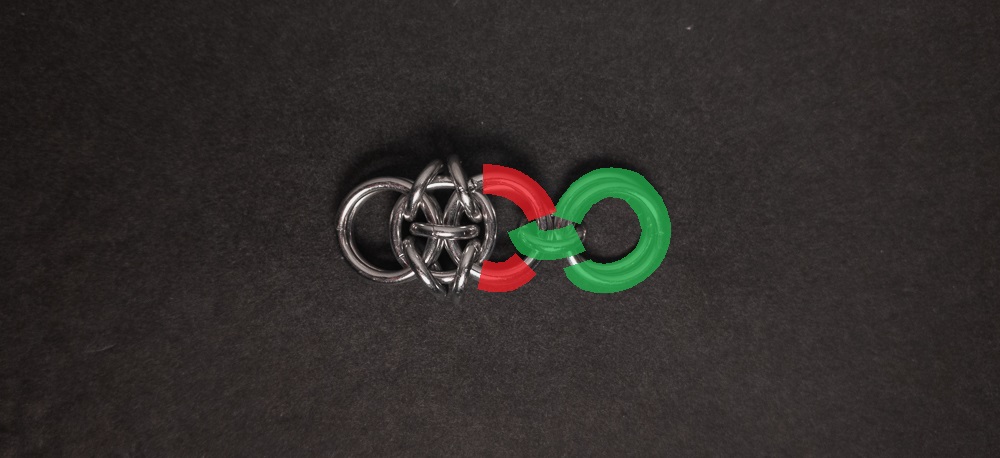
Now that the first unit is complete, we extend the chain. Begin by adding two large rings to a small ring (green in the image below) and add that small ring through the rightmost pair of 2 large rings of the first unit (red in the image below). When done, it should look something like this:
-
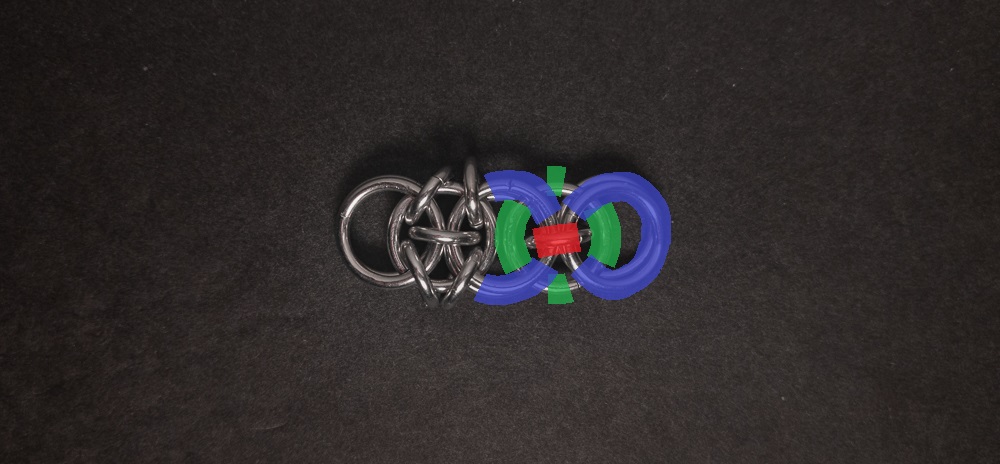
Add 1 new large ring (green in the image below) around the small ring from the previous step (red in the image below) such that it is at the center of all the large rings involved in step 4 (blue in the image below). When done, it should look something like this:
-
Add 4 new small rings (green in the image below) through the eyes formed by the large ring from the last step (blue in the image below) and the large rings from the step before the previous (yellow in the image below). If you separate the top and bottom by the small ring from the step before previous (red in the image below) and base the left and right on where the large rings from the last two steps are, you should put 1 new small ring through each combination of top/bottom and left/right. When done, it should look something like this:
-
Repeat steps 4 through 7 until the chain is as long as you want.
Notes
The Heltic weave is not very complex to understand and mostly easy to create. However, steps 2 and 5 can be a moderate challenge, similar to Helm Chain. In my opinion, the weave looks fantastic, resembling a punk version of Helm Chain. As a chain weave with a flat and wide cross-section, it is well-suited for use in chokers, bracelets, or strapping. While the weave is slightly less flexible when attempting to crease the broad side, it remains flexible overall and thus does not have many limitations. The name “Heltic” appears to be a portmanteau of Helm and Celtic, reflecting the weave’s inspiration from both styles. Given its aesthetic appeal, versatility, and relative ease of creation, I highly recommend learning how to make this weave.
Pictures
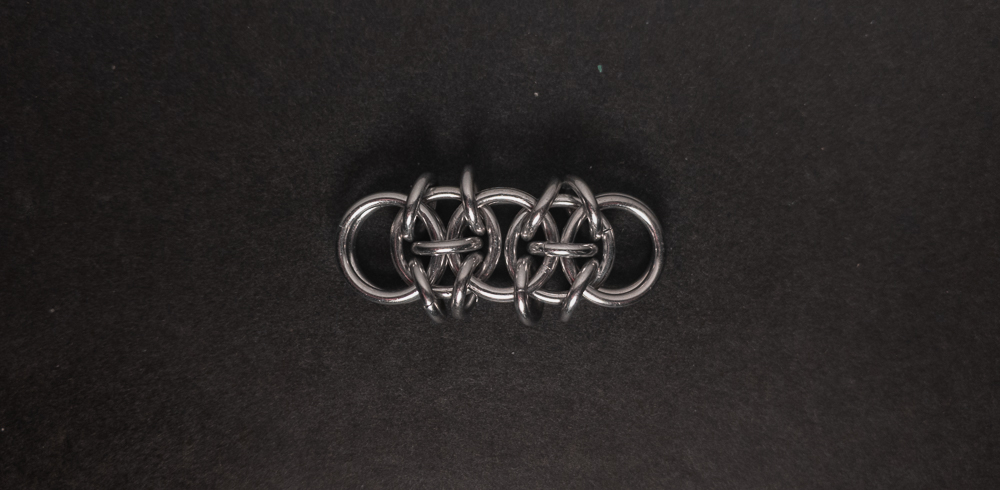
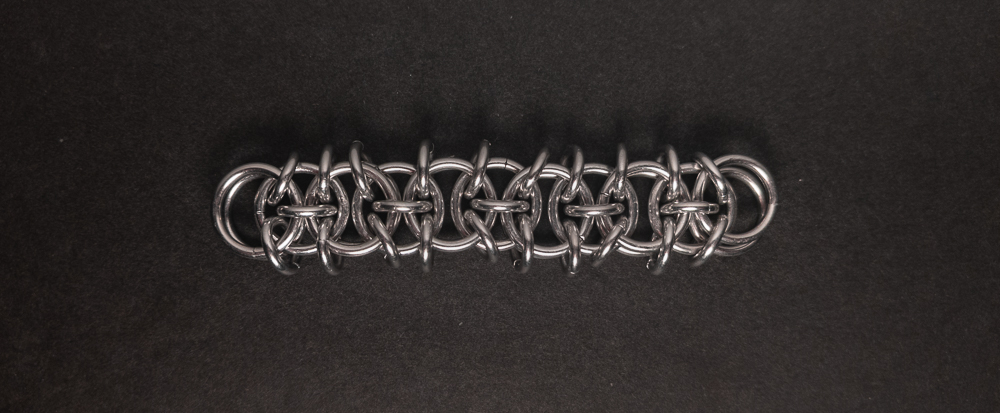
Flat
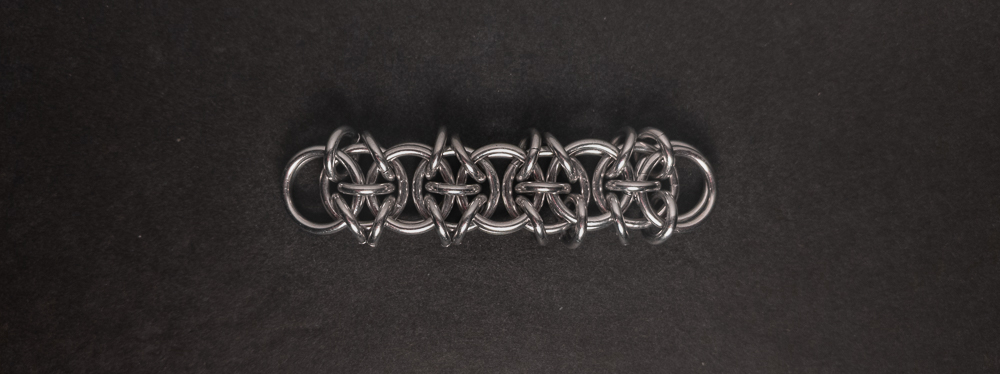
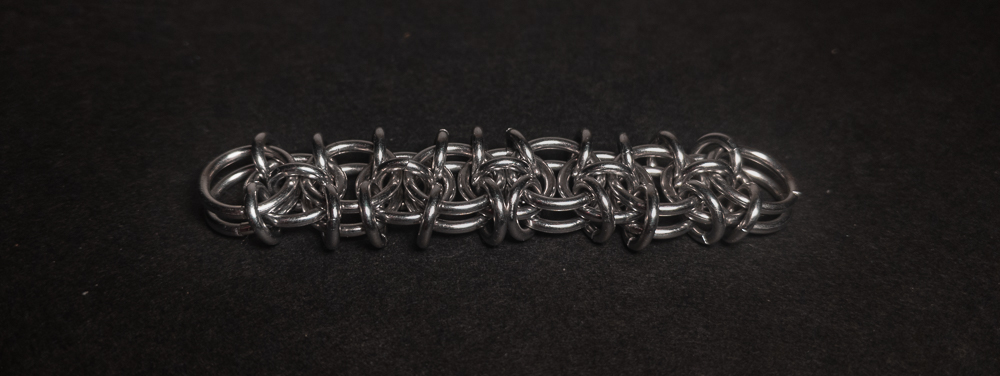
Flat: Angled
Flat: Profile

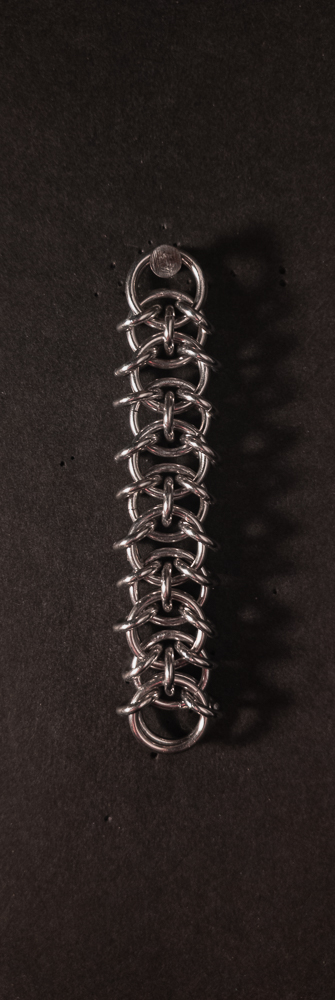
Vertical
Vertical: Profile

In Process